Creating an ROE Run
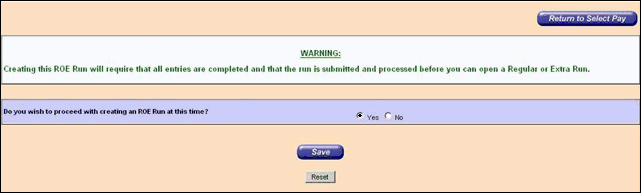
1. Once the Create New ROE Run link is clicked, a warning message will appear. Ensure Yes is selected for Do You Wish to Proceed with Create this ROE Run at this time and click Save to proceed.
2. From the Create ROE Run screen:
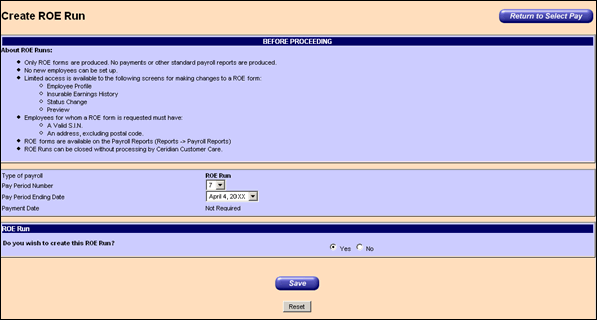
3. In the Pay Period Number field, select the Pay Period Number of the last regular run processed, or the next regular run to be processed from the drop-down list.
4. In the Pay Period Ending Date field, select the Pay Period Ending Date of the last regular run processed, or the next regular run to be processed from the drop-down list.
5. In the Payment Date field, Powerpay displays Not Required, to reinforce the fact that payments are not produced on ROE runs and therefore a Payment Date is not essential.
6. In the Do you wish to create this ROE Run? field, select Yes and click Save.
7. If updates are required to the employee’s demographic information, for example name, address, S.I.N, and/or Hire Date, for the ROE form complete a, b, and c below. If not proceed to 8.
a) Click the Employee Profile link.
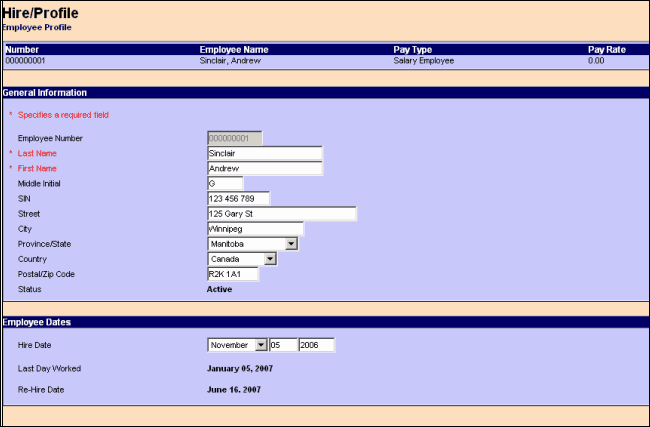
b) Make any required changes.
c) Click Save.
8. If EI adjustments are required to update any Insurable earnings that may not have been accounted for since the last pay period, complete a, b, and c below. If not proceed to 9.
a) Click the Insurable Earnings History link.
b) Make any required adjustments.
c) Click Save.
9. Click on the Status Changes link.

10. In the Action to be Taken field, select the appropriate status change to generate the employee’s ROE form.
Note: See Task 4-Payroll Entry - Step 4. Change Employee Status for more information about Status Changes.
11. Click Go.
12. Complete the fields as required and click Save.
13. Click the Process tab.
14. Click the Preview link to open the Preview screen and click Request.
15. Review the ROE form(s) produced.
16. If any modifications are required, return to the Employee Profile screen or the Insurable Earnings History screen and update as necessary.
17. Submit the ROE run for processing.

|
